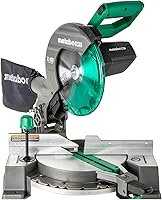
How to Cut Cove Molding With a Miter Saw
To cut cove molding with a miter saw, nest the molding upside down against the fence with its back edge flat on the table, set your miter and bevel to the angles for that corner, and cut. Keeping the molding in its "as-installed" upside-down position is the core trick, because the saw then matches the angle the molding meets the wall.
On this page (10 sections)
- Why do you cut cove molding upside down?
- How do you find the spring angle first?
- What miter and bevel settings does each corner need?
- How do you set up the saw for the first cut?
- How do you position and clamp the molding?
- How do you make and check the first test cut?
- What blade gives the cleanest cut in cove molding?
- How do you keep the cuts accurate on long runs?
- When should you use a different tool?
- What mistakes cause gaps at the joint?
To cut cove molding with a miter saw, nest the molding upside down against the fence with its back edge flat on the table, set the miter and bevel for that corner, and cut. The saw's table and fence then act as your wall and ceiling, so the blade meets the same surfaces the molding will meet in the room.
Why do you cut cove molding upside down?
You cut cove molding upside down so the saw's fence and table copy the wall and ceiling. The flat back of the molding goes down on the table and its top edge presses against the fence.
That puts the curved face toward you, in the same orientation it will hang.
This matters because a miter saw only cuts at two axes: the table angle (miter) and the blade tilt (bevel). The molding's spring angle is the third angle.
Nesting the molding upside down folds that third angle into the saw's two axes, so a single miter and bevel pair gives you the right joint.
Get the nesting wrong and no chart will save the cut. The back edge must lie flat, the top edge must touch the fence, and the molding must not rock.
A quick check: the curved face should point up and toward you, and the back should be fully seated on the table.
How do you find the spring angle first?
Check how the molding sits against a square corner before you cut anything. Hold a short offcut against the inside corner of a room or a scrap of plywood set up as a wall and ceiling.
The angle between the molding's back and the wall is its spring angle.
Most standard cove and crown-style molding is designed to sit at 45 degrees. Some profiles sit at 38 degrees.
The number changes your miter and bevel settings, so confirm it on the actual molding rather than assuming.
If the molding won't sit flush when nested on the saw, your spring angle is the reason. You can mark the spring angle on the saw with a bevel gauge or use the miter and bevel numbers for that angle from a printed chart.
Either way, cut a test piece before you touch the real stock.
What miter and bevel settings does each corner need?
For a 45-degree spring angle, inside and outside corners use a 45-degree miter and a 35.3-degree bevel, with the bevel direction flipped for outside corners. Those odd decimals are normal and are why cove molding frustrates first-time cutters.
For a 90-degree corner, the miter stays at 45 degrees in either direction. The bevel is what changes with the spring angle.
A 45-degree spring angle calls for about 35.3 degrees of bevel; a 38-degree spring angle calls for about 31.6 degrees.
Write the numbers down before you start. Inside corners need the left and right pieces cut as mirror images.
Outside corners need the opposite pair. Getting the left and right mixed up is the most common reason two "correct" cuts don't meet.
How do you set up the saw for the first cut?
Unplug the saw, set the miter and bevel to your chart numbers, and lock both. Then nest the molding and clamp it before you lower the blade.
Start with the miter: release the table lock and swing the head to 45 degrees left or right. Lock it and confirm the pointer lines up with the mark.
On a saw with detents, listen for the stop and check it hasn't slipped past.
Next set the bevel. Most compound miter saws bevel to 45 degrees in one or both directions.
Set the blade tilt to your chart number, lock the bevel lever, and check the blade is clear of the table and fence.
The WEN MM1015 bevels up to 45 degrees in either direction and miters up to 49 degrees in either direction, so it covers both corner types with room to spare. Its dual-rail slide system lets it sit flush against a wall, which helps when you're cutting long molding in a tight room.
How do you position and clamp the molding?
Set the molding upside down against the fence and hold it with a clamp, not your hand. The back edge sits flat on the table and the top edge presses against the fence.
Line up your cut mark with the blade's kerf line. On saws with an LED cutline, the light throws a shadow against the blade, so you can see exactly where the tooth will enter the wood.
That helps when the mark is on the curved face and hard to see.
Clamp the molding near the cut, but keep the clamp clear of the blade path. A quick-clamp that fits the saw's table slot works well.
The WEN ships with a quick-clamp assembly, two adjustable support fences, and a dust port, so the clamping and support hardware is in the box.
Keep the molding from rocking by checking that both the back edge and the top edge stay in contact. If the profile is wide, a cradle or a spacer block behind it holds the nesting angle steady.
Long molding also needs support at both ends, or the piece will sag and shift mid-cut.
How do you make and check the first test cut?
Cut a short offcut first and hold it against the corner to test the fit. This is the step that saves real molding from becoming scrap.
Mark the offcut with the same orientation you'll use on the real piece. Cut it with the miter and bevel you've set.
Then take it to the corner and press it into place.
Look for light between the molding's edges and the wall or ceiling. A tight fit means your settings are right.
A gap at the top or bottom means the spring angle or bevel is off; a gap along the face means the miter is wrong. Adjust one setting at a time and cut another offcut.
Once the test piece sits flush, cut your first real piece. Repeat the test at each new corner type, since inside and outside corners use opposite cuts.
Cut the longer piece first if you have any doubt, so you have room to re-cut.
What blade gives the cleanest cut in cove molding?
A fine-tooth crosscut blade gives the cleanest edge in cove molding. More teeth means a smoother face and less tear-out on the curved profile, which matters because the face is what you see.
Cove and crown profiles are thin and often painted or stained. A blade with a high tooth count and a negative hook angle helps keep the cut controlled and reduces chipping at the exit.
A thin kerf also needs less power from the saw.
The Freud LU91M010 is a 10-inch, 60-tooth thin-kerf blade with a 5/8-inch arbor. Its negative hook angle is designed to keep the blade from climbing and to push the work down toward the fence, which suits nested molding.
Check the arbor size matches your saw before you swap blades.
How do you keep the cuts accurate on long runs?
Support the molding at both ends and clamp every cut. Long pieces flex, and flex is what throws off a bevel cut.
Set up roller stands or support fences at the same height as the saw table. The WEN's two adjustable support fences help hold the piece level.
A sagging end tips the molding and changes the angle at the blade.
Keep your miter and bevel locked between cuts and check the pointer hasn't drifted. If you're cutting many pieces at the same corner type, cut them in batches so you set the saw once.
Re-check the first piece of each batch against the corner.
A dual-bevel saw makes outside corners easier because you don't have to flip the molding or reach around the blade. The Bosch CM10GD bevels 47 degrees left and right with detents at 0, 33.9 and 45 degrees, and its up-front bevel lock and range selector keep settings reachable without leaning behind the saw.
Its axial-glide hinge arms also cut the front-to-back footprint by up to 10 inches compared to slide saws with similar capacity, which helps in small rooms.
When should you use a different tool?
Use a miter saw for the corner miters and bevels, and a table saw or coping saw for straight runs and inside-corner copes. A miter saw is the right tool when the cut is at an angle, not when the cut is a long straight rip.
For inside corners on an out-of-square wall, a coping cut hides the mismatch better than a miter. A coping saw or a jigsaw handles that.
For long straight lengths against a flat wall, a table saw or a circular saw gives a cleaner rip.
Cove molding itself needs a compound cut, so a compound miter saw is the better fit. A plain miter saw only swings on the table and can't tilt the blade, so it can't make the bevel that cove molding needs.
If you're wondering what jobs a miter saw is built for in the first place, our guide to what a miter saw is used for covers the full list. And if you're choosing between a basic saw and a compound model, our comparison of miter saw vs compound miter saw explains the difference.
If you're also cutting thicker trim or framing, check whether a miter saw can cut a 4x4 before you buy. And if you plan to cut metal trim alongside wood, our answer on whether a miter saw can cut aluminum covers blade and safety notes.
What mistakes cause gaps at the joint?
The three common mistakes are wrong nesting, a drifted bevel, and no clamp. Each one leaves a gap you can usually see from across the room.
Wrong nesting puts the molding's back edge off the table or its top edge off the fence. The cut looks right on the saw but misses in the corner.
Re-seat the molding so both surfaces touch.
A drifted bevel happens when the lock slips or the pointer reads a fraction off. Check the bevel against a bevel gauge after locking.
If your saw has a detent override, make sure it isn't holding the head between stops.
No clamp means the molding shifts as the blade enters. Even a small shift turns a tight joint into a gap.
Clamp before every cut, not just the first. Keep a spare piece of each corner type on hand so a damaged piece has a matching replacement.
The answer to how to cut cove molding with a miter saw comes down to nesting the molding upside down and trusting the chart. Set the miter and bevel for the spring angle, clamp every cut, and test-fit before you fasten.
Practice on scrap, then cut the real pieces in labeled pairs.
Frequently asked questions
Do I need a sliding saw to cut cove molding?
No. A standard compound miter saw handles cove molding for most interior walls, since the molding is thin and light.
A sliding saw helps when you're cutting wide crown profiles or long pieces you can't reposition easily, because the sliding head reaches farther across the board.
Why does the molding go in upside down?
Because the saw's table and fence stand in for your wall and ceiling. When the molding sits upside down with its back edge flat on the table and its face against the fence, the blade cuts the same angle it will meet on the wall, so your miter and bevel numbers line up with the corner.
What spring angle should I use?
Match the angle the molding is designed to sit at, usually 45 degrees for standard crown-style cove. If the molding doesn't sit flush when nested, adjust the bevel and miter numbers from the chart you're using, or mark a test cut on a scrap piece first.
How do I keep the molding from sliding during the cut?
Clamp it. A quick-clamp or a shop-made cradle holds the molding against the fence so it can't shift.
Small movements on a bevel cut turn into gaps at the joint, so set the clamp before you lower the blade.
Can I cut cove molding on a table saw instead?
You can, but a miter saw is the easier tool for the miters and bevels at corners. A table saw is better for long straight rips.
For corner joints, the miter saw's fence and table keep the molding at the angle it meets the wall.