How to Square a Miter Saw
To square a miter saw, unplug it, set the miter table to 0 degrees, and hold a square against the blade and the fence. If the gap shows, loosen the miter detent plate or fence and adjust until the square sits flush on both faces.
On this page (9 sections)
- Why does a miter saw go out of square?
- How do you check the blade against the fence?
- How do you check the blade against the table?
- How do you adjust the miter detent plate to square?
- How do you adjust the fence to square?
- How do you check the bevel stop on a compound saw?
- What test cut confirms the saw is square?
- Which saws make squaring easier?
- How often should you recheck square?
To square a miter saw, unplug it, set the miter table to 0 degrees, and hold a square against the blade and the fence. A gap on either face means the saw needs a small adjustment before you trust it on trim.
This matters on every cut, which is why the setup step comes before learning what is a miter saw used for in a real workflow.
The blade-to-fence and blade-to-table checks are separate. Both must pass, or your 45-degree miters will close on one corner and open on the other.
Do them in order and the second one is quick.
Why does a miter saw go out of square?
A saw goes out of square from a bumped fence, a worn detent stop or a blade that isn't sitting flat. Shipping, jobsite handling and repeated bevel changes all move the reference surfaces slightly.
The miter detent plate is the most common culprit. A saw that has been knocked or dropped can lose its 0-degree stop, so "straight" is no longer straight.
The fence is the next suspect, especially on saws that have been slid or clamped hard against a truck bed.
A dirty table or a scrap of sawdust under the fence also throws the angle off. Clean the surfaces before you measure anything, because a wood chip under the fence can look like a fence problem.
If the cut is off by a large amount rather than a hair, suspect the blade itself. A bent blade or a loose arbor bolt changes the cut angle as much as a fence does.
Check those before you reach for a screwdriver.
How do you check the blade against the fence?
Set the miter to 0 degrees and hold a square flat against the fence with its other leg against the blade. The blade should touch the square evenly along its full length, with no light showing.
Lock the miter handle first. A table that moves while you measure will give you a false reading.
Lower the head until the blade sits just above the table.
Use a machinist square or a known-square framing square. A plastic speed square is fine for a rough check but can be off enough to hide a small error.
Rest the square's short leg against the fence and bring the long leg up to the blade.
Look for light between the blade and the square. A gap at the top or bottom of the blade means the fence or the table is out of line.
Repeat on the other side of the blade if your saw allows it.
How do you check the blade against the table?
Lower the head and rest the square on the table with its leg against the blade. This checks whether the blade sits perpendicular to the table surface, which the fence check does not cover.
With the miter locked at 0, bring the head down until the blade nearly touches the table. Slide the square in from the side so its base sits flat on the table and its vertical leg meets the blade.
A gap between blade and square at the top or bottom means the saw's bevel is not returning to zero. That is a bevel stop problem, not a fence problem.
Adjust the bevel stop before you touch the fence.
Do this with the blade guard in place and the saw unplugged. The guard gets in the way, but the square can slide under it with the head lowered partway.
How do you adjust the miter detent plate to square?
Loosen the screws that hold the detent plate, rotate the table until the square reads flush, then tighten. The plate usually has two or three screws under or behind the table.
Set the miter to the 0-degree detent first. Loosen the plate screws just enough that the plate can move without wobbling.
Nudge the table until the blade touches the square evenly.
Snug the screws and recheck. A plate that shifts when you tighten needs to be held in place while you turn the screws.
If your saw has an adjustable 0-degree stop screw instead, use that and skip the plate.
Check the 45-degree detents after the 0 stop is set. Some saws let the plate move as a unit and keep the other stops aligned.
Others need each stop checked, so test 45 both ways on scrap.
How do you adjust the fence to square?
Loosen the fence bolts, tap the fence until the square reads flush, and retighten. The fence is the surface your stock rides against, so a fence that leans throws every cut.
Mark the current position first with a pencil line so you can see how far you moved it. Loosen the bolts at the back or side of the fence, leaving them just snug.
A soft mallet or a block of wood lets you tap the fence without marring it.
Bring the square against the fence and the blade again. When the gap closes, tighten the bolts in a cross pattern so the fence doesn't creep.
Recheck after tightening.
Some fences are one piece and some are two. On a two-piece fence, check each side against the blade and adjust them separately.
A fence that is square on one side and not the other will cut miters that don't match.
How do you check the bevel stop on a compound saw?
Set the bevel to 0, lower the head, and check the blade against the table square. A compound saw adds a second axis, and a bevel stop that is off tilts every cut.
Bevel stops sit on the back of the saw, usually as a screw or a lock nut at 0, 45 and sometimes 33.9 degrees. Loosen the stop, tilt the head until the square reads flush against the table, then retighten.
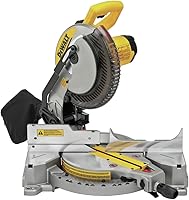
The DeWalt DWS716 offers bevel stops at 0, 22.5, 33.9 and 45 degrees, so each one gets its own check. Set the most-used stop first, which for most trim work is 0.
After setting 0, test a 45-degree bevel on scrap and check the cut face against a square. If the scrap leans, the stop needs another tweak.
Repeat for the left and right bevels, since they use separate stops.
What test cut confirms the saw is square?
Cut a piece of flat scrap, stand it on edge, and check the cut face with a square. A test cut catches errors that a blade-only check misses, because it measures the finished surface.
Use a board wide enough that the blade cuts through in one pass and thick enough to stand on edge. Cut it at 0 degrees, then hold the square against the cut end and the board's edge.
Light under the square means the cut leans.
Then cut a 45-degree miter and butt the two pieces together. The joint should close evenly along its full length.
A gap at the inside corner or the outside corner points to the miter stop or the fence.
Repeat the 45 test on both sides if your saw miters both ways. A saw that cuts clean on the left and gaps on the right has a stop problem on one side only.
Fix that stop rather than the whole table.
Which saws make squaring easier?
Saws with marked positive stops and clear scales are quicker to square and easier to keep square. The stops give you a reference to return to after every change.
The Skil MS6305-00 has 11 positive stops at common angles and a cam miter lock knob. More stops mean fewer places for the table to drift between settings.
Its dual-bevel head also lets you check both bevel sides without flipping stock.
The Makita LS1040 has 9 positive miter stops and a machined aluminum base. A flat, rigid base holds its shape better than a stamped table, so the square check stays stable over time.
Its bevel cuts up to 45 degrees to the left.
None of these saws arrives perfectly square, and none stays that way after a drop. Plan on a check after transport.
If you need to fix more than the angle, our guide to how to adjust a miter saw covers the fence, stops and blade in one place. For buyers weighing the two main saw styles before they set one up, miter saw vs compound miter saw explains the difference in the head and base.
Shoppers who want a low-cost starting saw can compare budget miter saws with the same stop and fence features.
How often should you recheck square?
Recheck after any move, any heavy cut and any time a joint gaps. A saw that sat in a truck or got bumped on a bench can drift before the next cut.
The blade-to-fence check takes under a minute. The blade-to-table check takes about the same.
Do both at the start of a trim job and after switching bevel settings, since the bevel return is where a saw most often loses square.
Keep a square within reach of the saw. A quick check before a run of miters costs less time than recutting a whole set of casing.
If the saw is off, fix the stop before you cut more stock.
Replace a blade that stays out of square after the stops are set. A bent blade shows up as a cut face that leans even when the square says the saw is true.
Keep a spare blade on hand for trim work.
Squaring a miter saw is a two-minute job when you know the order. Check the blade against the fence, check it against the table, and confirm with one test cut.
Adjust the detent plate or fence only where the square shows a gap. Do the checks after every move and your miters will close the way they should.
Frequently asked questions
Can I square a miter saw without a machinist square?
Yes. A 1-inch thick scrap of flat board and a fine pencil line work as a field check.
Stand the board on edge against the fence, bring the blade down beside it, and look for light between blade and board.
How often should I check square?
Check after moving the saw, after a heavy cut, and any time a joint gapes. A quick square check takes under a minute and catches the drift before it ruins a run of miters.
Does squaring the saw fix a blade that wanders?
No. A wandering cut usually means a bent blade, a loose arbor bolt or a warped fence.
Square the saw first, then inspect the blade and fence if the cut still leans.
Why does my miter saw cut short on 45-degree miters?
A 45-degree cut that misses the corner usually means the detent stop is off or the blade is not square to the fence. Set the miter to 0, square the blade, then return to 45 and test on scrap.