How to Build a Miter Saw Table
To build a miter saw table, make a flat top at the same height as your saw's deck, add a sturdy base and a straight fence aligned with the blade. Check that the deck and fence are square and flush before you mount the saw.
On this page (9 sections)
- What does a miter saw table need to do?
- Which saw should sit on your table?
- What materials and tools do you need?
- How do you size the top to your saw?
- How do you build the base?
- How do you add a fence?
- How do you mount the saw and check the build?
- How do you keep the table flat and safe over time?
- How to build a miter saw table that stays square
To build a miter saw table, make a flat top at the same height as your saw's deck, add a sturdy base and a straight fence aligned with the blade. Check that the deck and fence are square and flush before you mount the saw.
The table does one job: it holds the saw steady and supports long boards so cuts stay square. A solid, flat build costs little and makes your saw easier to use all day.
What does a miter saw table need to do?
A miter saw table holds the saw at a stable height and keeps the workpiece level as it passes the blade. If the deck sags or the base rocks, the cut drifts and the corner won't close.
Think of the table as a workbench shaped around the saw. The saw sits in a recess or on top, with the deck flush with its base so stock glides across without catching.
The fence must run straight through the blade line.
Support matters too. Long boards tip the saw's base and pull the cut offline, so the table needs enough top area or added supports on both sides.
Plan the size around the longest boards you cut most often.
A level, rigid top and a solid frame are more important than fancy storage. Add drawers or shelves only after the basic build is flat and stable.
For a quick primer on what the saw does, see what is a miter saw used for.
Which saw should sit on your table?
Any 10-inch compound or sliding miter saw works, but the saw's footprint and weight decide the top size and base strength. A lighter saw suits a simple mobile table, while a sliding saw needs more depth and a stiffer top.
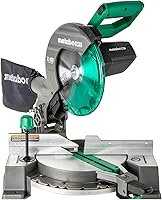
The Metabo HPT C10FCG2 is a 10-inch single-bevel saw that weighs about 24 lbs. Its light build makes it easy to lift onto a bench you move around the shop.
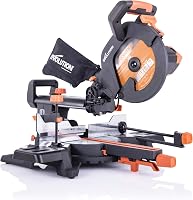
A sliding saw takes more room. The WEN MM1015 is a dual-bevel sliding model that crosscuts boards up to 12 inches wide and 3.75 inches thick, and its dual-rail slide lets it sit flush against a wall.
That means a deeper top and a stiffer frame behind it.
The Ryobi 10-inch saw runs a 14-amp motor up to 5,500 rpm with an LED cutline indicator. Its 1-1/4-inch dust port matters if you plan a hose run through the table.
Deciding between saw types first? Read miter saw vs compound miter saw before you cut any wood.
If budget is the limit, a budget miter saw still fits a homemade table.
What materials and tools do you need?
You need lumber for the frame, sheet goods for the top, and basic fasteners, plus a saw to cut the pieces. Buy flat, straight boards; a warped leg or bowed top will twist the whole table.
For the frame, 2x4 lumber works well for legs and rails. For the top, two layers of 3/4-inch plywood glued and screwed together make a stiff deck.
A thinner sheet on its own will flex under a heavy saw.
Gather screws, wood glue, a drill, a square, a tape measure, a pencil, and a sander. You'll also want a saw to cut the lumber, ideally the miter saw you're building for, though a circular saw works too.
Plan the cutout for the saw's base before you fasten the top. Measure the saw's footprint and add a little clearance so the base drops in without binding.
Seal or paint the top to handle dust and damp air.
How do you size the top to your saw?
Set the top height to match your saw's deck, then size the footprint around the longest stock you cut. Measure the saw base, the deck height and the blade's reach before drawing any lines.
Start with height. Stand at the table as you would to cut and mark a comfortable working height.
Then check that your saw's deck sits at that height, or build a base that lifts the saw to it. A deck flush with the table top is the goal.
For width, give yourself room on both sides of the blade. Boards longer than the top need roller stands or extension supports, so plan mounting points for them.
The saw's cut capacity tells you how much width you'll handle in one pass.
Depth depends on the saw. A sliding saw needs clearance behind it for the rails to travel.
Measure the full travel and add a few inches so nothing catches the wall.
How do you cut the opening for the saw?
Mark the saw's base outline on the top and cut the opening slightly larger so the base drops in flush. Test-fit the saw before fastening the top to the base.
Trace the base, then cut just outside the line with a jigsaw or circular saw. Keep the edges straight so the saw doesn't rock in the opening.
If you mount the saw on top instead of in a recess, skip the opening and bolt it straight down.
Check the deck height after the saw sits in place. A thin shim under one corner can fix a small gap, but a large gap means recutting the opening.
How do you build the base?
A solid base is four legs joined by rails, sized to fit under the top. Build it square and level so the top sits flat without shimming.
Cut the legs to the height that puts the top at your chosen working height. Join them with rails at the top and near the floor, using glue and screws.
Check diagonals with a tape measure and adjust until they match; equal diagonals mean a square frame.
Add a lower shelf or cross braces to stop the frame from racking. A table that wobbles when you push a board through the blade will throw cuts off square.
If the table will move around the shop, fit locking casters before you attach the top.
How do you add a fence?
The fence is a straight board set parallel to the blade and flush with the saw's own fence. It supports long stock and gives you a reliable edge to slide work along.
Cut the fence from straight stock and check it against a square. Fasten it to the top so its face lines up with the saw's fence; a step or gap here catches board ends.
Many builders add a replaceable strip in front of the blade so the fence can be renewed after wear.
Line the fence up with the blade using a square. If the fence runs out of line with the blade, every cut comes out crooked.
Recheck after the saw is bolted down, since mounting can shift things slightly.
For compound cuts, your saw's bevel and miter controls do the work. If you want to understand those settings, read how does a compound miter saw work before your first angled cut.
How do you mount the saw and check the build?
Bolt or clamp the saw to the top, then check flatness, square and fence alignment before making a test cut. Small errors here show up in every joint you cut later.
Use the saw's mounting holes to bolt it down, or clamp the base firmly. A rubber mat under the base adds grip if you want to remove the saw later.
Make sure the deck around the blade is level with the saw's base so stock doesn't tip.
Lay a straightedge across the top to check for gaps. A hollow spot under the saw pulls the base down and throws the blade out of square.
Add shims or recut the top if you find one.
Then make test cuts in scrap. Cut a square end and check it against a square, then cut a 45-degree miter and fit two pieces together.
A tight joint means the table and saw agree.
How do you keep the table flat and safe over time?
Keep the table dry, flat and free of wobble, and check the saw's mounting and fence after any move. Wood moves with moisture, so a sealed top holds its shape longer.
Wipe off sawdust and clear the dust port or hose so chips don't pile up under the blade. Keep cords routed away from the cut line and off the floor where you stand.
Check the fence and blade alignment now and then, especially after rolling the table across a bumpy floor. Re-tighten the saw bolts and look for split wood around the mounting holes.
Store the table on a flat surface, not leaning against a wall, since long storage on edge can bow the top. A quick straightedge check before each big project takes seconds and saves recuts.
How to build a miter saw table that stays square
Build flat, square and flush, and the table will reward you with clean cuts. Start with the base, match the top to your saw's deck, then bolt the saw down and check it with test cuts.
Choose the Metabo HPT C10FCG2 for a light saw on a mobile table, the WEN MM1015 for a sliding saw that needs depth, or the Ryobi for its LED cutline and dust port. Then measure your saw before cutting any wood, and keep the top sealed and level.
If you're still deciding on the saw itself, compare budget miter saws before you build. A good table makes even a modest saw cut straighter.
Frequently asked questions
How tall should a miter saw table be?
Match the top to your saw's deck height so workpieces sit flush. Around 33 to 37 inches suits many standing users, but comfort matters more than a fixed number.
Build the base first and measure your saw before cutting the top.
Do I need to buy plans to build a miter saw table?
No. A simple table is four legs, a frame, and a flat top with a cutout for the saw.
Measure your saw, cut the opening to fit, and add a fence.
Plans help only if you want drawers or a folding design.
Can I use plywood for the table top?
Yes. Two layers of 3/4-inch plywood glued together make a stiff, flat deck.
Seal or paint it to resist moisture.
Avoid thin or warped sheets, because a bowed top throws off square cuts.
How do I keep the saw from sliding on the table?
Bolt the saw to the top through its mounting holes, or clamp it firmly in place. A rubber mat under the base adds grip.
Check the fence alignment after every mount so the blade stays square to the work.
Can I move the table once it is built?
A simple wooden table is heavy, so plan its spot before you build. Add locking casters if you need to roll it around the shop.
Keep the top flat, because a twisted frame makes cuts drift.