Miter Cut vs Bevel Cut: What Each One Does
A miter cut angles across a board’s face; a bevel cut tilts through its thickness. Use a miter for corner joints, a bevel for angled edges, and both together for a compound angle.
On this page (8 sections)
- What is the difference between a miter cut and a bevel cut?
- How can you tell a miter from a bevel on the board?
- When should you use a miter cut?
- When should you use a bevel cut?
- What is a compound cut?
- How do you choose the right saw adjustment?
- What common mistakes make the cut confusing?
- Which cut should you use for your project?
A miter cut angles across a board’s face; a bevel cut tilts through its thickness. Use a miter for corner joints, a bevel for an angled edge, and both together for a compound angle.
The difference is easiest to see by looking at the board from two directions. A miter changes the angle across its width, while a bevel changes the slope of the cut from one face to the other.
What is the difference between a miter cut and a bevel cut?
A miter cut turns the cut line across the board’s face, while a bevel cut tips the blade through the board’s thickness. The saw’s miter setting controls the first angle, and its bevel setting controls the second.
Picture a board resting flat on the saw table. For a miter, the blade stays upright but the saw head or table turns, so the cut crosses the board at an angle instead of square across it.
For a bevel, the board stays in position while the blade leans to one side. The cut face is sloped, which can change how two pieces meet at an edge.
A 45-degree angle can describe either cut. The name depends on which adjustment creates that angle, not on the number alone.
How can you tell a miter from a bevel on the board?
Look at the cut face from above for a miter and from the side for a bevel. A miter line runs diagonally across the board’s width; a bevel makes the cut face lean through the board’s thickness.
If a board is laid flat, the miter is easy to see on its top face. The bevel is easier to see at the cut end, where one edge of the face sits farther in or out than the other.
Keep the board’s position in mind when you inspect it. A board standing on edge can make the angles harder to recognize, but the definitions still refer to the saw’s miter and bevel adjustments.
When should you use a miter cut?
Use a miter cut when two pieces need to meet at an angle across their faces. It’s common for picture frames, trim corners, and other joints where angled ends come together.
For a square frame, two matching 45-degree miters can meet to form a 90-degree corner. The angle you need depends on the joint and the corner, so measure before setting the saw.
The saw’s miter scale helps set the angle, but it doesn’t guarantee a tight joint in every room. Walls and trim can be out of square, so test the fit and adjust the pieces as needed.
For a practical trim example, see how to cut baseboard corners with a miter saw. If you want to make a standard angled cut, how to cut a 45-degree angle with a miter saw explains the setup.
When should you use a bevel cut?
Use a bevel cut when the edge needs to slope through the board’s thickness. Bevels can help pieces fit against angled surfaces or create a slanted edge along trim and other projects.
A bevel changes the shape of the cut face rather than turning the cut line across the board. The amount of tilt depends on the job, and the correct angle may not be the same as the angle of the surface.
Check that the saw can tilt in the direction you need. A single-bevel saw tilts one way, while a dual-bevel saw can tilt both ways; learn what a dual-bevel miter saw is before choosing one.
What is a compound cut?
A compound cut combines a miter and a bevel on the same cut. It angles across the board’s face and slopes through its thickness at once.
This setup is useful when a joint needs both angles, such as some crown molding cuts. The right settings depend on how the material sits against the saw and the shape of the joint.
A compound miter saw lets you set both adjustments. For help choosing the tool type, read compound miter saws: sizes, types and picks.
How do you choose the right saw adjustment?
Set the miter adjustment for the angle across the face and the bevel adjustment for the tilt through the thickness. Confirm the board’s position and the saw manual before making a cut.
Use this quick check:
- If the blade remains upright and turns across the board, it’s a miter cut.
- If the blade tilts while the board stays in place, it’s a bevel cut.
- If both adjustments change, it’s a compound cut.
Keep hands clear of the blade path, secure the workpiece, and use eye and hearing protection. Make a test cut on scrap to check the fit and follow the saw manual.
A standard miter saw may not have a bevel adjustment. A compound model adds that tilt, while sliding models add a rail movement that can help cut wider boards; see what a sliding compound miter saw is.
Which saw features help with both miter and bevel cuts?
A compound saw with clear angle scales and positive stops can make it easier to set both cuts. Choose based on the angles and material sizes your projects call for, then check the saw manual for its limits.
The DeWalt DWS716 has a double-bevel design, with a bevel range from 0 to 48 degrees left and right and positive stops at 0, 22.5, 33.9, and 45 degrees.
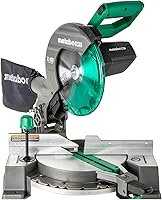
The Metabo HPT C10FCG2 is a single-bevel compound saw with a bevel range from 0 to 45 degrees left. Its miter range is 0 to 52 degrees left and right.
The Ridgid R4210 is a dual-bevel sliding miter saw. Its adjustable miter and bevel detents have a bypass, and it has an LED cut line indication and work light.
These features describe different ways to set up a cut, not a promise that a particular joint will fit without adjustment. Test the angle on scrap and follow the manual for securing the workpiece.
What common mistakes make the cut confusing?
The most common mistake is treating every angled cut as a miter. Check whether the blade turns across the board or tilts through its thickness before choosing a setting.
Another mistake is mixing up the saw angle with the finished corner angle. Two pieces can each be cut at 45 degrees to form a 90-degree corner, but a different joint may call for other settings.
Material position matters too. Mark the face and edge you want to keep, then place the board against the fence and table as the cut requires.
Finally, don’t assume the miter or bevel scale accounts for a wall that is out of square. Make a test cut, check the joint, and adjust the setup if the gap shows the angle is off.
Which cut should you use for your project?
Choose a miter when pieces meet across their faces, a bevel when the cut edge needs a slope, and a compound cut when the joint needs both. The board’s position and the shape of the joint determine the settings.
For baseboard corners, start with how to cut baseboard corners. For a joint that needs a tilt and a turn together, follow how to cut compound angles on a miter saw.
A simple rule helps: turn the saw for a miter, tilt the blade for a bevel, and adjust both for a compound cut. Make a test cut before using finished material.
Frequently asked questions
What is the difference between a miter cut and a bevel cut?
A miter cut angles across the width of a board while the blade stays upright. A bevel cut tilts the blade so the cut slopes through the board’s thickness.
A compound cut combines both angles, which is useful for some trim joints.
Is a 45-degree cut a miter or bevel?
It can be either, depending on which saw adjustment you make. A 45-degree miter angles the cut across the board’s face, while a 45-degree bevel tilts the blade through its thickness.
Check the workpiece orientation and saw scale before cutting.
Do I need a compound miter saw to make bevel cuts?
A compound miter saw can make both miter and bevel cuts, but a standard miter saw may not tilt for bevels. Check the saw’s features and manual before planning angled edge cuts.
For a simple bevel, another suitable saw or hand tool may also work.
What is a compound cut on a miter saw?
A compound cut combines a miter angle across the board’s face with a bevel angle through its thickness. Both adjustments affect the cut, so test the setup on scrap and confirm the angles before cutting finished trim.